Cutting and measuring templates accurately is probably the most tedious but most important part of making a quilt.
I use two types of templates, pattern templates and card templates. The pattern templates are used to trace the card templates and to cut the material to the required shapes and sizes.
Pattern templates can be made from thick cardboard or template plastic. You will need to cut two templates for each shape you require for the quilt. One will be for the base template which will be the size of the piece required as detailed on the pattern. The second will be used for cutting the material. This template will be 1 to 1.5 cm larger.
Note: As I am going to be cutting a lot of card templates I am going to use template plastic for my pattern template. Thick card is also suitable but you might find the template plastic is more durable.Card templates can be made from any used greeting cards or thick posters. Make sure the card is not to thick as it will be hard to push a needle through it. You can also now buy packets of templates from quilting shops and on eBay.
Requirements:
- quilt template pattern
- ruler
- pencil
- pile of used greeting cards
- thick card or template plastic
Lachlan's quilt has four pattern pieces. I will be making two templates for each piece. I will use template plastic for the main pieces and a thick card for the templates that will be used to cut the material.
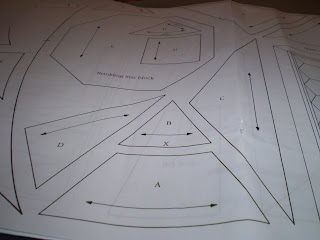
From the pattern I will be using the 4 pieces marked a, b, c, & d
Pattern templatesThe easiest way to make your template is to lay the template plastic over the top of the pattern and trace the pattern pieces. Carefully cut the templates out.
 Note: Template plastic can be hard to cut as scissors can leave the edge uneven. You can use a roller cutter leaning the blade against a ruler as a guide
.
Label your templates and draw any fabric guide lines as detailed on the pattern.
If you are using cardboard you can either measure and draw the template shapes onto the cardboard or you can trace the pattern and lay it on your cardboard.
Use whatever method suits you best. The main thing is that you have pattern templates which are the exact size as the pattern.
Once you have all your pattern templates you can now make the templates for cutting your material.
Material templatesThe templates for cutting material do not need to be as exact as the pattern or card templates. I make my templates 1cm larger than the pattern template. This is going to be your seam allowance for each piece.
Most patterns have a slightly smaller seam allowance however I find that 1 cm allows you to have a good turnover of fabric to tack it on to the card.
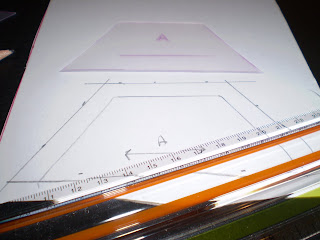
The easiest way to make your material template is to lay the pattern template onto the thick card and trace around the edge.
Using your ruler measure 1 cm around the template. Repeat this process for all templates ensuring that you label all templates and copy any instructions from t
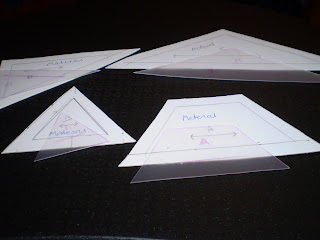
he pattern.
Card templatesGetting the size of the card templates right is really important as these are the templates used in the quilt. If one template is not cut to the correct size it can affect the whole block or quilt.
Being consistent with the tools you use is the best way to make sure your templates are the same size.
You should try and use the same pencil or pen, ruler, pattern template and scissors. The finer the pen nib or pencil tip the better it will be.
Because we are hand stitching the pieces you can adjust your fabric and stitching where your template might have been a couple of millimeters out in size. As a guide, if a card template is more than 1mm smaller or larger than it should be then I don't use it.
One thing to note is that when you trace around any pattern template the card templates may end up a millimeter or so bigger than the actual pattern size. So long as ALL the card templates are 1mm bigger it will not affect the making of the quilt.
As my small triangle templates are 1mm bigger than the actual

pattern I now need to make sure the card templates for the other three templates are also 1mm bigger than the actual pattern.
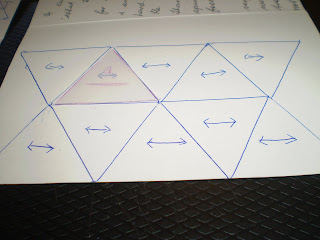
It is up to you how you cut your card templates out. I try and use as much of an old card as I can laying the templates side by side.
Cut the require number of card templates as detailed in the pattern. I prefer to cut out all of my card templates before starting anything else. I find that it usually takes me one or two evenings to draw and cut enough templates from the cards. I keep all of my card templates in a plastic zipper bag ready for use.
For this quilt I need to cut the card templates as follows:
Template A 234
Template B 234
Template C 12
Template D 2
Once you have cut your pattern and card templates your ready to start cutting out the fabric and tacking each piece onto the card.


 pattern I now need to make sure the card templates for the other three templates are also 1mm bigger than the actual pattern.


